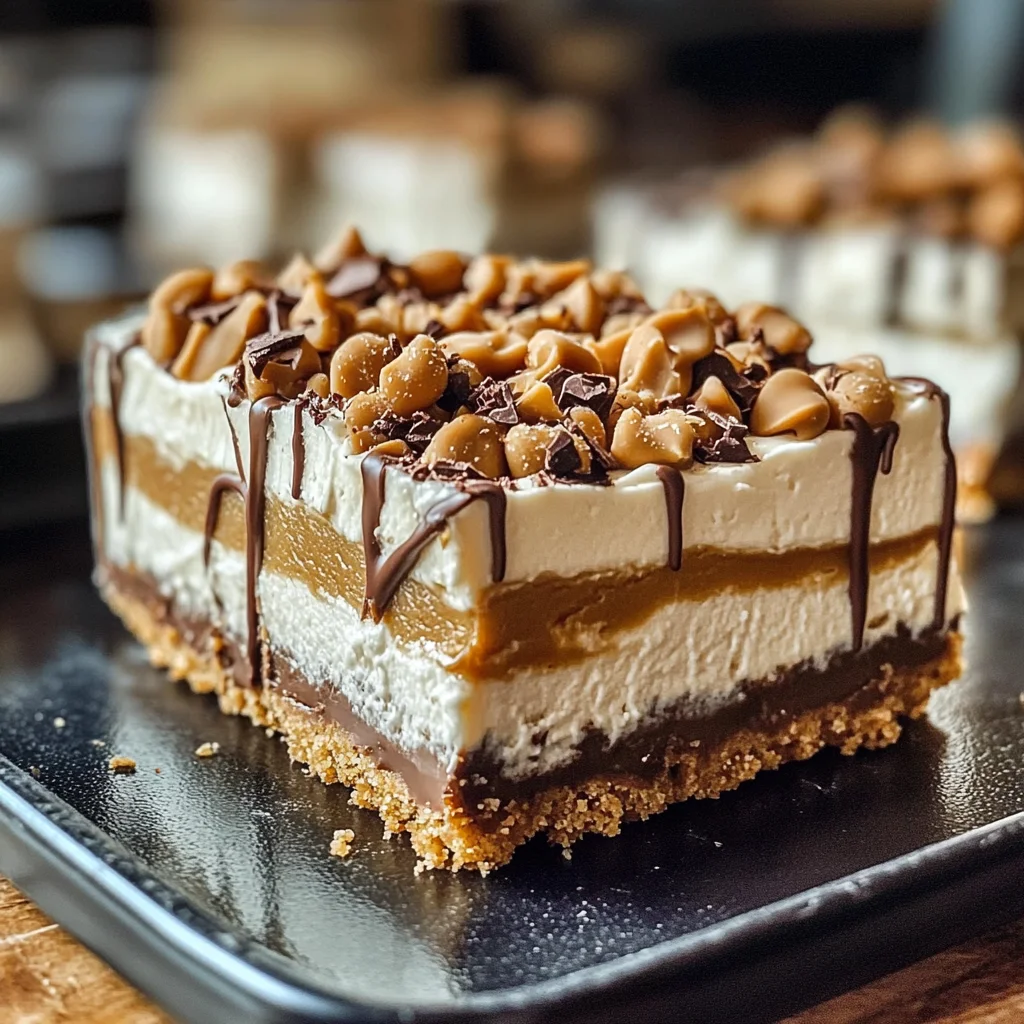
No Bake Peanut Butter Cheesecake Bars
If you’re looking for a dessert that’s easy to whip up and always impresses, you’ve found it! No Bake Peanut Butter Cheesecake Bars are the ultimate sweet treat. They combine creamy peanut butter goodness with a crunchy graham cracker crust, making them a hit at family gatherings or just a little indulgence for yourself on a busy weeknight. The best part? There’s no baking involved, so you can enjoy them without the stress.
These bars are not only delicious but also incredibly versatile. Whether you’re hosting a party or simply treating yourself after a long day, these cheesecake bars will surely bring a smile to your face. Let’s dive into why this recipe is one of my favorites!
Why You’ll Love This Recipe
- Super easy to make: With just a few simple steps, you’ll have a delightful dessert ready in no time.
- Family favorite: Kids and adults alike love the creamy peanut butter flavor—it’s sure to please everyone!
- Make ahead option: These bars can be prepared in advance, making them perfect for parties or meal prep.
- No baking required: Say goodbye to the oven! This recipe is as simple as mixing and chilling.
- Optional chocolate drizzle: Elevate your dessert experience with an easy chocolate topping for extra indulgence.
Ingredients You’ll Need
This recipe calls for simple, wholesome ingredients that you may already have at home. Here’s what you’ll need to create these delightful No Bake Peanut Butter Cheesecake Bars:
For the Crust
- 1 ½ cups graham cracker crumbs
- ¼ cup melted coconut oil or vegan butter
- ¼ cup sugar
For the Cheesecake Filling
- 1 cup creamy peanut butter
- 1 package (8 oz) cream cheese, softened
- ½ cup powdered sugar
- 1 teaspoon vanilla extract
- 1 cup whipped coconut cream
Variations
One of the best things about this recipe is its flexibility! Feel free to mix things up according to your taste preferences or what you have on hand.
- Add nuts: Chopped peanuts or walnuts can add a delightful crunch and enhance the flavor.
- Change up the sweetener: Experiment with maple syrup or agave instead of powdered sugar for a different sweetness.
- Include chocolate chips: Fold some mini chocolate chips into the filling for an extra chocolatey bite.
- Try different nut butters: Swap out peanut butter for almond or cashew butter if you want to switch things up!
How to Make No Bake Peanut Butter Cheesecake Bars
Step 1: Prepare the Crust
Start by mixing together your graham cracker crumbs, melted coconut oil (or vegan butter), and sugar in a bowl. This combination creates that perfect crunchy base that balances out the creamy filling. Press this mixture firmly into the bottom of a lined baking dish. This step is important because it forms the foundation of your cheesecake bars!
Step 2: Make the Filling
In another bowl, beat together your softened cream cheese and peanut butter until smooth. Then, add in the powdered sugar and vanilla extract, mixing until everything is well combined. Finally, gently fold in the whipped coconut cream. This step makes your filling light and fluffy—just how we like our cheesecake!
Step 3: Assemble and Chill
Spread the creamy filling evenly over your prepared crust. Make sure it’s nice and smooth on top! Now comes the waiting game; cover your dish and place it in the refrigerator for at least four hours (or overnight if you can resist). Chilling allows it to set properly, resulting in perfectly sliceable bars.
Step 4: Serve and Enjoy!
Once set, cut your No Bake Peanut Butter Cheesecake Bars into squares or rectangles. If you’re feeling fancy, drizzle some melted chocolate on top before serving. Now sit back and watch as everyone enjoys this delicious treat—you might just become their favorite chef!
Pro Tips for Making No Bake Peanut Butter Cheesecake Bars
Making No Bake Peanut Butter Cheesecake Bars is a breeze, but a few handy tips can elevate your dessert to the next level!
-
Use Room Temperature Ingredients: Let your cream cheese and peanut butter sit out for about 30 minutes before mixing. This ensures a smoother texture and helps them blend perfectly together.
-
Choose the Right Sweetener: Opt for powdered sugar instead of granulated sugar in your cheesecake filling. It dissolves easily and creates a creamy filling without any gritty texture.
-
Chill Thoroughly: Allow your bars to chill for at least 4 hours (or overnight) in the fridge. This helps them set properly, making it easier to cut into perfect squares.
-
Line Your Pan: Use parchment paper to line your baking dish. This simple step makes it much easier to lift the bars out and slice them neatly without sticking.
-
Experiment with Flavors: Feel free to add vanilla extract or a pinch of salt to enhance the flavor profile of your cheesecake. These simple additions can make a big difference!
How to Serve No Bake Peanut Butter Cheesecake Bars
Presenting your No Bake Peanut Butter Cheesecake Bars beautifully can turn an already delightful dessert into a showstopper! Here are some fun ideas on how to serve them:
Garnishes
- Chopped Peanuts: Sprinkle some chopped peanuts on top for added crunch and a lovely visual appeal.
- Chocolate Drizzle: A drizzle of melted dairy-free chocolate enhances both flavor and presentation, making the bars extra indulgent.
- Fresh Berries: Adding fresh raspberries or strawberries not only brightens the plate but also adds a refreshing contrast to the rich cheesecake.
Side Dishes
- Fruit Salad: A light fruit salad with seasonal fruits complements the richness of the cheesecake bars while adding freshness.
- Coffee or Tea: Serving these bars with a cup of coffee or herbal tea provides a lovely balance, making it perfect for an afternoon treat or dessert after dinner.
- Vegan Ice Cream: For an extra indulgent experience, pair with a scoop of vegan ice cream. The creaminess pairs beautifully with the texture of the cheesecake bars.
- Yogurt Parfait: Layered yogurt with granola and fruits can be a delightful side that contrasts nicely with the dense bars while adding a healthy touch.
These thoughtful serving suggestions will not only enhance your No Bake Peanut Butter Cheesecake Bars but also impress everyone at your gathering! Enjoy every bite!

Make Ahead and Storage
These No Bake Peanut Butter Cheesecake Bars are perfect for meal prep! You can whip them up ahead of time and keep them on hand for a sweet treat whenever you need a little pick-me-up.
Storing Leftovers
- Store any leftover bars in an airtight container in the refrigerator.
- They will stay fresh for up to 5 days.
- For best results, cut the bars after they’ve set to keep them from getting too soft.
Freezing
- Wrap individual bars tightly in plastic wrap and then place them in a freezer-safe container.
- They can be frozen for up to 3 months.
- To enjoy, simply thaw in the fridge overnight before serving.
Reheating
- No need to reheat these bars; they’re best served chilled.
- If desired, let them sit at room temperature for about 10 minutes before enjoying for a softer texture.
FAQs
Have questions about making No Bake Peanut Butter Cheesecake Bars? Here are some answers to common inquiries!
Can I use a different nut butter for the cheesecake?
Absolutely! While this recipe features peanut butter, you can substitute it with almond butter or cashew butter for a delicious variation.
How do I make No Bake Peanut Butter Cheesecake Bars healthier?
To make these bars healthier, consider using reduced-fat cream cheese and natural sweeteners like maple syrup or agave nectar instead of powdered sugar.
Can I add toppings to my No Bake Peanut Butter Cheesecake Bars?
Definitely! Drizzle with melted chocolate or sprinkle with crushed nuts or shredded coconut for added texture and flavor.
How long do No Bake Peanut Butter Cheesecake Bars last in the fridge?
These delightful bars can last up to 5 days when stored properly in an airtight container in the refrigerator.
Can I make these bars gluten-free?
Yes! Simply use gluten-free graham crackers or a suitable alternative to create the crust.
Final Thoughts
I hope you’re as excited as I am about making these No Bake Peanut Butter Cheesecake Bars! They’re not only simple but also incredibly satisfying. Whether you’re serving them at a gathering or treating yourself after a busy day, these bars are sure to impress. Enjoy the creamy goodness and don’t hesitate to share your experience with me. Happy baking (or should I say no-baking)!
No Bake Peanut Butter Cheesecake Bars
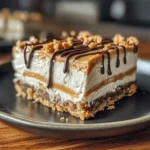
Indulge in the deliciousness of No Bake Peanut Butter Cheesecake Bars, a creamy and satisfying dessert that requires no oven time! These bars blend rich peanut butter with a crunchy graham cracker crust, making them perfect for any occasion—from family gatherings to a well-deserved treat after a busy day. Easy to prepare and even easier to enjoy, these no-bake delights are sure to impress your friends and family. Plus, they can be made ahead of time, allowing you to serve a stunning dessert without the last-minute stress. Elevate your dessert game with these simple yet indulgent cheesecake bars!
- Prep Time: 20 minutes
- Cook Time: None
- Total Time: 0 hours
- Yield: Serves approximately 12 bars 1x
- Category: Dessert
- Method: No Baking
- Cuisine: American
Ingredients
- 1 ½ cups graham cracker crumbs
- ¼ cup melted coconut oil or vegan butter
- ¼ cup sugar
- 1 cup creamy peanut butter
- 8 oz cream cheese, softened
- ½ cup powdered sugar
- 1 teaspoon vanilla extract
- 1 cup whipped coconut cream
Instructions
- Prepare the crust by mixing graham cracker crumbs, melted coconut oil (or vegan butter), and sugar in a bowl. Press into a lined baking dish.
- In another bowl, beat softened cream cheese and peanut butter until smooth. Add powdered sugar and vanilla; mix well. Gently fold in whipped coconut cream.
- Spread the filling evenly over the crust. Cover and chill for at least 4 hours or overnight until set.
- Cut into squares and serve. Optionally drizzle with melted chocolate before serving.
Nutrition
- Serving Size: 1 serving
- Calories: 210
- Sugar: 9g
- Sodium: 120mg
- Fat: 15g
- Saturated Fat: 7g
- Unsaturated Fat: 8g
- Trans Fat: 0g
- Carbohydrates: 18g
- Fiber: 1g
- Protein: 4g
- Cholesterol: 20mg