Butterfinger Balls Recipe: A Quick and Easy Delight
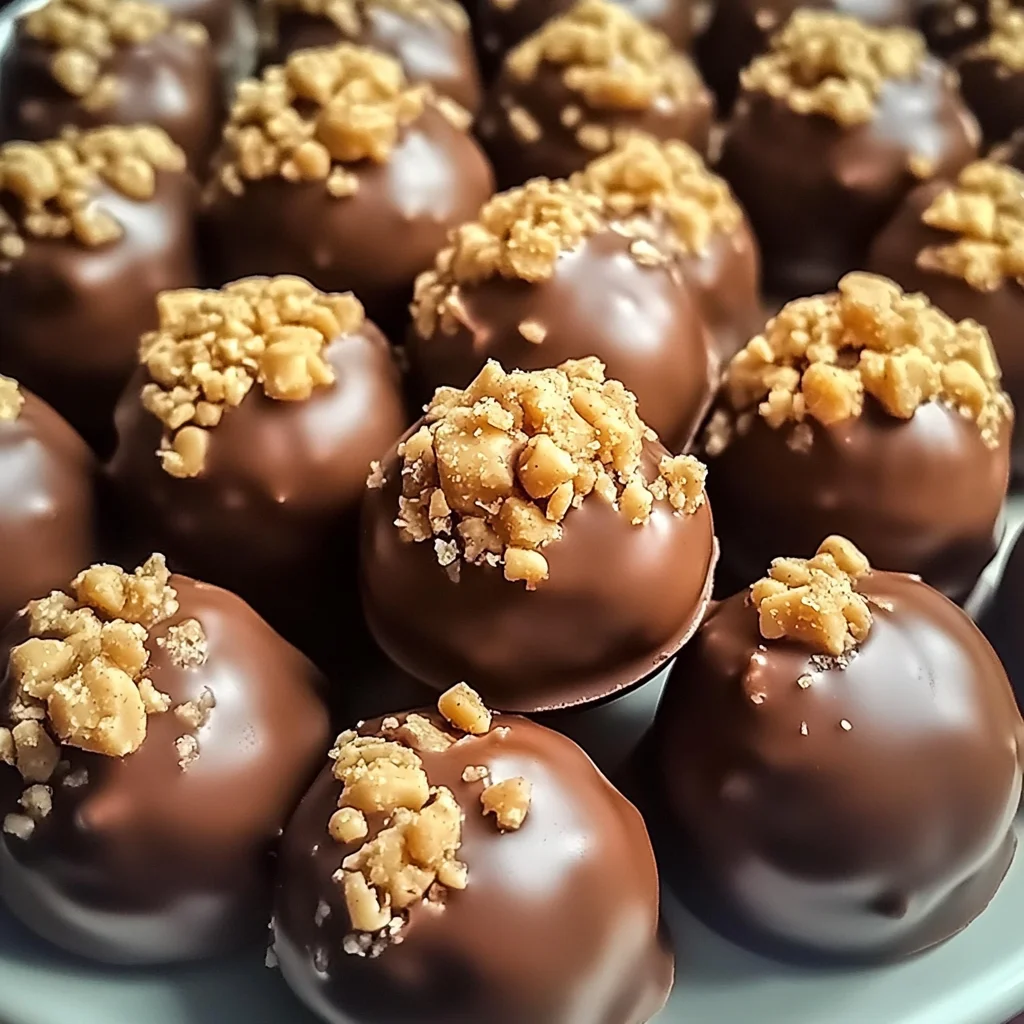
If you’re looking for a delightful treat that’s super easy to make and will have everyone asking for seconds, then this Butterfinger Balls Recipe: A Quick and Easy Delight is just what you need. These sweet little bites are packed with creamy peanut butter and crunchy Butterfinger bars, making them a perfect snack for busy weeknights or a fun addition to family gatherings. Plus, they’re no-bake, which means less fuss and more time to enjoy with your loved ones!
What makes this recipe special is its simplicity. With just a handful of ingredients, you can whip up these tasty treats in no time. Whether it’s a cozy movie night or a festive celebration, these Butterfinger balls are bound to bring smiles all around.
Why You’ll Love This Recipe
- Quick and easy preparation: This recipe comes together in just about 25 minutes, making it perfect for those last-minute cravings.
- Family-friendly appeal: Kids love getting involved in the kitchen! Rolling the balls and dipping them in chocolate is fun for everyone.
- Make-ahead convenience: You can prepare these treats ahead of time and store them in the fridge for up to a week—if they last that long!
- Delicious flavor combination: The rich peanut butter paired with the sweet chocolate and crunchy Butterfingers creates a flavor explosion that is simply irresistible.
- Customizable toppings: Get creative with toppings! You can use crushed candies, sprinkles, or even a sprinkle of sea salt for an extra kick.

Ingredients You’ll Need
These ingredients are simple and wholesome, making it easy to gather everything you need. You’ll find that most of them might already be in your pantry!
For the Base
- 4 tablespoons unsalted butter, softened
- 1 teaspoon vanilla extract
- 1 cup peanut butter (not all-natural; no oil separation)
- 1 cup powdered sugar
- ¾ cup grachicken chicken ham cracker crumbs
- ½ cup crushed Butterfinger bars
For Coating
- 8 ounces chocolate bark or chocolate chips (for coating)
Optional Toppings
- Extra crushed Butterfinger bars
- Festive sprinkles
- Coarse sea salt
Variations
One of the best things about this recipe is how flexible it can be! Feel free to mix things up based on your taste preferences or what you have on hand.
- Add different toppings: Swap out the crushed Butterfinger for other candies like M&M’s or chopped nuts to create your own signature flavor.
- Use dark chocolate: For a richer taste, try coating your balls in dark chocolate instead of milk chocolate.
- Make it a bit healthier: Substitute some of the powdered sugar with honey or maple syrup for a different sweetness profile.
- Try flavored nut butters: Experiment with almond or cashew butter instead of peanut butter for a unique twist!
How to Make Butterfinger Balls Recipe: A Quick and Easy Delight
Step 1: Mix the Base
In a large bowl, use either a hand mixer or stand mixer to cream together the peanut butter and softened butter until it’s nice and smooth. This step is essential because it blends the flavors together beautifully. Then, add in the vanilla extract and mix until it’s fully incorporated—this will add that lovely aromatic touch to your treats!
Step 2: Add Sweetness and Crunch
Gradually mix in the powdered sugar at low speed. Be sure to scrape down the sides of the bowl as needed so everything combines evenly. Once mixed, fold in those scrumptious graham cracker crumbs and crushed Butterfinger bars until everything is evenly distributed. This mixture is going to be heavenly!
Step 3: Form the Balls
Line a baking sheet with parchment paper for easy cleanup later on. Scoop about 1 to 1½ tablespoons of your mixture and roll it into balls between your hands. Place these little morsels spaced apart on the sheet—this helps them keep their shape when they chill.
Step 4: Chill to Set
Pop those trays into the freezer for about 30 minutes or until they’re completely firm. Chilling is crucial because it helps maintain their shape once you dip them in chocolate.
Step 5: Melt the Chocolate
In a microwave-safe bowl, melt your chocolate bark or chips using 30-second intervals at 50% power. Stir between each interval until it’s smooth but avoid overheating! This step ensures that your coating will be glossy and delicious.
Step 6: Dip and Decorate
Once your balls are chilled, dip each one into the melted chocolate—go all out if you like! You can coat them fully or halfway based on your preference. Immediately sprinkle with extra crushed Butterfingers, sea salt, or any festive decorations before the chocolate sets—it’s all about adding those personal touches!
Step 7: Let Them Set
Allow your beautiful creations to harden at room temperature or pop them back into the fridge until firm. Store them in an airtight container in the fridge where they’ll last up to one week—if they survive that long without being devoured!
And there you have it—a fantastic treat that brings joy with every bite!
Pro Tips for Making Butterfinger Balls Recipe: A Quick and Easy Delight
Making these delicious Butterfinger balls is a breeze, especially when you follow a few simple tips!
-
Use Room Temperature Ingredients: Starting with softened butter and room temperature peanut butter will ensure a smoother mixture, making it easier to combine all ingredients thoroughly.
-
Chill Before Dipping: Freezing the balls before dipping them in chocolate not only makes them easier to handle but also helps the chocolate coating to set better, creating a beautiful finish.
-
Experiment with Chocolate: While chocolate bark is great, feel free to use dark or milk chocolate chips for different flavor profiles. Each type of chocolate brings its own unique sweetness and richness to the treat.
-
Customize Your Coating: Don’t hesitate to get creative! Consider rolling some of the balls in crushed nuts or cookie crumbs instead of just crushed Butterfinger for added texture and flavor.
-
Keep It Fresh: Store your Butterfinger balls in an airtight container in the fridge to maintain their freshness. This ensures they stay deliciously soft and delightful for longer!
How to Serve Butterfinger Balls Recipe: A Quick and Easy Delight
These delightful treats can be served in various ways that will impress your family and friends. Here are some fun ideas!
Garnishes
- Extra Crushed Butterfinger Bars: Sprinkle additional crushed bars on top right after dipping for an extra pop of flavor and crunch.
- Festive Sprinkles: Add colorful sprinkles for special occasions or holidays to make your treats visually appealing.
- Coarse Sea Salt: A light sprinkle of coarse sea salt can enhance the sweetness of the chocolate, providing a lovely contrast.
Side Dishes
- Fresh Fruit Platter: A selection of fresh fruits like strawberries or apple slices offers a refreshing balance to the sweet treats.
- Vanilla Ice Cream: Serve alongside a scoop of creamy vanilla ice cream for an indulgent dessert experience that pairs perfectly with these rich bites.
- Coffee or Hot Chocolate: These treats go wonderfully with a warm beverage, so consider serving them with coffee or hot cocoa for a cozy touch.
- Cheese Board: Create a mini cheese board with assorted cheeses and crackers—this savory addition can complement the sweetness of the Butterfinger balls beautifully.
Now you’re all set to create these quick and easy delights! Whether you enjoy them as an afternoon snack or serve them at your next gathering, they’re sure to be a crowd-pleaser. Happy snacking!
Make Ahead and Storage
This Butterfinger Balls Recipe is perfect for meal prep or quick snacks, allowing you to enjoy delicious treats anytime. Here’s how to keep them fresh!
Storing Leftovers
- Place leftover Butterfinger balls in an airtight container.
- Store them in the refrigerator for up to 1 week.
- Ensure they are separated by parchment paper if stacked to avoid sticking.
Freezing
- To freeze, place the balls on a baking sheet lined with parchment paper.
- Freeze them individually until solid, then transfer to a freezer-safe container or bag.
- They can be stored in the freezer for up to 2 months.
Reheating
- These treats are best enjoyed cold or at room temperature, so no reheating is necessary.
- If desired, let them sit at room temperature for about 10 minutes before serving.
FAQs
Have questions about this delightful recipe? Here’s some helpful information!
Can I make this Butterfinger Balls Recipe dairy-free?
Yes! You can substitute the unsalted butter with a dairy-free margarine or coconut oil. Make sure your chocolate coating is also dairy-free.
How can I adjust the sweetness of my Butterfinger Balls?
If you prefer less sweetness, reduce the amount of powdered sugar slightly. However, keep in mind that this may affect the texture.
What if I can’t find crushed Butterfinger bars?
You can use any similar candy bar that provides a crunchy texture and sweet flavor. Alternatively, crushed graham crackers or other candies can work as substitutes.
How do I ensure my Butterfinger Balls hold their shape?
Make sure to chill them thoroughly before dipping in chocolate. This helps maintain their round shape during the coating process.
Are these Butterfinger Balls Recipe suitable for parties?
Absolutely! They make a fantastic addition to any gathering and are sure to impress your guests with their rich flavor and fun appearance.
Final Thoughts
I hope you find joy in making these easy Butterfinger balls! They’re not only simple but also bring smiles to faces young and old alike. Whether you’re preparing them for a special occasion or just treating yourself, I’m sure you’ll love every bite. Enjoy your sweet creations, and happy cooking!
Butterfinger Balls Recipe: A Quick and Easy Delight

Indulge in the delightful simplicity of our Butterfinger Balls Recipe: A Quick and Easy Delight. These no-bake treats combine creamy peanut butter and crunchy Butterfinger bars for a flavor explosion that’s sure to please everyone. Perfect for movie nights, family gatherings, or just satisfying your sweet tooth, these delicious bites come together in just 25 minutes. With minimal fuss and maximum flavor, they’re a hit with kids and adults alike! Customize with your favorite toppings or make them ahead of time for a convenient snack option that lasts up to a week in the fridge.
- Prep Time: 15 minutes
- Cook Time: 10 minutes
- Total Time: 25 minutes
- Yield: Approximately 12 servings 1x
- Category: Dessert
- Method: No-bake
- Cuisine: American
Ingredients
- 4 tablespoons unsalted butter, softened
- 1 teaspoon vanilla extract
- 1 cup peanut butter (not all-natural; no oil separation)
- 1 cup powdered sugar
- ¾ cup graham cracker crumbs
- ½ cup crushed Butterfinger bars
- 8 ounces chocolate bark or chocolate chips (for coating)
- Extra crushed Butterfinger bars (for optional topping)
- Festive sprinkles (for optional topping)
- Coarse sea salt (for optional topping)
Instructions
- In a mixing bowl, cream together softened butter and peanut butter until smooth. Add vanilla extract.
- Gradually mix in powdered sugar, then fold in graham cracker crumbs and crushed Butterfinger bars.
- Roll mixture into balls (1 to 1½ tablespoons each) and place on a lined baking sheet.
- Chill in the freezer for 30 minutes until firm.
- Melt chocolate bark or chips in intervals until smooth.
- Dip chilled balls into melted chocolate and decorate as desired.
- Let set at room temperature or refrigerate until firm.
Nutrition
- Serving Size: 1 ball (30g)
- Calories: 130
- Sugar: 12g
- Sodium: 50mg
- Fat: 8g
- Saturated Fat: 3g
- Unsaturated Fat: 5g
- Trans Fat: 0g
- Carbohydrates: 14g
- Fiber: 1g
- Protein: 2g
- Cholesterol: 5mg